GCW Zero OpenDingux emulation in Qemu
by Dmitry Smagin on 2015-05-02
Tagged as: Qemu, OpenDingux, Buildroot, Dingoo a320, GCW Zero.
This article deals with running OpenDingux for GCW Zero handheld on top of MIPS Malta board emulation in Qemu. In the same way RPi is ‘emulated’ using ARM Versatile board (see article here)
In both cases it means that no GPU hardware is emulated and programs using OpenGL ES or SDL2 libraries most probably won’t work at all. However, most other programs not using GPU will work just fine and this could be enough for developers to do testing and debugging of their applications.
Preparing kernel and rootfs images
Before starting check if you have mipsel toolchain located at /opt otherwise download from here and unpack to /opt.
> git clone -b jz-3.16-qemu  https://github.com/dmitrysmagin/linux.git
> cd linux
> export ARCH=mips
> export CROSS_COMPILE=/opt/opendingux-toolchain/usr/bin/mipsel-linux-
> make gcw0-qemu_defconfig
> make
Despite the name ‘gcw-qemu_defconfig’ it has little to do with GCW Zero hardware. In fact it’s a greatly reduced ‘malta_defconfig’ with some tweakings needed for OpenDingux:
- Patch which allows i8042 serial controller to properly enable on emulated Malta board. This makes AT standard keyboard work in qemu. For some reason this is missing from mainline kernel, see related discussion.
- Patch that makes cirrusfb driver behave closer to GCW Zero’s driver. Double/triple buffering and IPU rescaling are not supported but applications that rely on them will run just fine. If an application requests a resolution that is different from 320x240, cirrusfb just sets requested resolution as-is without rescaling.
- Using initramfs with device tree in tree.txt and mininit.
- Unused hardware is eliminated from defconfig, some other drivers are built statically.
- Kernel command line is hardcoded to
CONFIG_CMDLINE="boot=/dev/sda loop0=/boot/rootfs.squashfs root=/dev/loop0 video=cirrusfb:320x240-16@60
After compilation is complete the kernel image is located at current directory: ./vmlinux
Buildroot system is used to create rootfs for GCW Zero. Unlike Dingoo a320 it’s compiled for mips32r2 which supports hardware float.
> git clone -b opendingux-2014.08-qemu https://github.com/dmitrysmagin/buildroot.git
> cd buildroot
> make gcw0-qemu_defconfig
> make
This rootfs is a hacked one which accomodates to Malta platform. The differences are:
- Redirect serial output to ttyS0 instead of ttyS2
- Mount /dev/sda as /boot instead of /dev/mmcblk0p1
- Mount /dev/sdb as /media/data instead of /dev/mmcblk0p2
- Mesa3d, etna_viv, SDL2 and Love2d are disabled
- Removed GCW Zero specific patches for SDL (vsync on pan and triple buffering)
Note that applications using triple buffering will still work.
After compilation is complete the image is located at output/images/rootfs.squashfs
Preparing disk images
Unlike Dingoo a320, OpenDingux is the only operating system for GCW Zero, so it’s installed on the internal sd-card. The card is divided into two partitions:
- System partition (FAT) which is mounted at /boot. It holds kernel and rootfs images and some system files. FAT is chosen to facilitate things for Ubiboot.
- User partition (EXT4) which is mounted at /media/data. It holds user data and installed applications (either in *.opk binary packages or as-as).
For the sake of simplicity two separate images could be created which would be seen by Malta as /dev/sda and /dev/sdb.
> # Create system partition, 128 Mb is enough
> dd if=/dev/zero of=128M bs=1M count=128
> mkdosfs 128M
> sudo mount 128M /mnt/
> sudo cp rootfs.squashfs /mnt/
> sudo umount /mnt/

> # Create user data partition, 512 Mb is ok
> dd if=/dev/zero of=DATA bs=1M count=512
> mkfs.ext4 DATA
> sudo mount DATA /mnt/
> sudo mkdir /mnt/apps
> # copy opks to /apps
> sudo cp *.opk /mnt/apps
> sudo umount /mnt/
Running on Linux host
The typical script to run qemu on Linux looks like:
#!/bin/sh
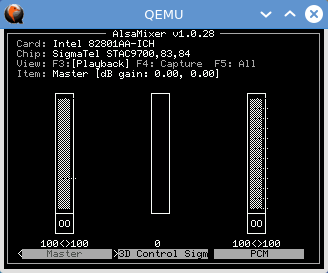
# Possible values: pa, alsa, sdl, oss, none, wav
export QEMU_AUDIO_DRV=alsa
MACHINE="-M malta -m 256"
FIRMWARE="-kernel vmlinux -hda 128M -hdb DATA"
HARDWARE="-sdl -soundhw ac97 -k en-us -rtc clock=vm"
NETWORK="-net nic,model=e1000 -net user"
SERIAL="-serial stdio -monitor none"
qemu-system-mipsel $MACHINE $FIRMWARE $HARDWARE $NETWORK $SERIAL
Running on Windows host
The typical script to run qemu on Windows looks like (run-gcw0.bat):
@cls
set PORTFWD=hostfwd=tcp::21-:21,hostfwd=tcp::22-:22,hostfwd=tcp::23-:23

@rem Possible values: winwave, dsound, sdl, fmod, none, wav
set QEMU_AUDIO_DRV=dsound

set MACHINE=-M malta -m 256
set FIRMWARE=-kernel vmlinux -hda 128M -hdb DATA
set HARDWARE=-sdl -soundhw ac97 -k en-us -rtc clock=vm
set NETWORK=-net nic,model=e1000 -net user,%PORTFWD%
set SERIAL=-serial telnet:127.0.0.1:5555,server,nowait

set SETTINGS=%MACHINE% %FIRMWARE% %HARDWARE% %NETWORK% %SERIAL%

qemu-system-mipselw -L BIOS %SETTINGS%
Note that -sdl parameter forces qemu to avoid using gtk (which is the default output for qemu on Windows) and -k en-us instructs to use US keyboard layout. If any is omitted the arrow buttons stop working.
As SDL forcefully catches stdio output to file, serial is redirected to localhost:5555. Putty or similar program could be set up to connect to qemu.
First run qemu, then putty. Set Host Name to localhost, Port to 5555, Connection type to telnet and Saved Sessions to ‘telnet’ or any other name. Press Save and you are done. Optionally, Window -> Translation -> Remote character set could be set to UTF-8. Double click on the ‘telnet’ and press any key on black screen. Normally, there would be some output.
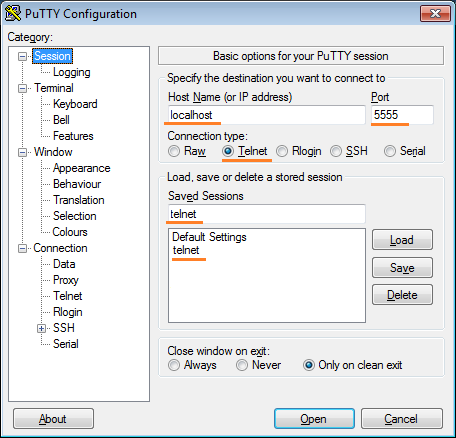
Setting up Putty for qemu
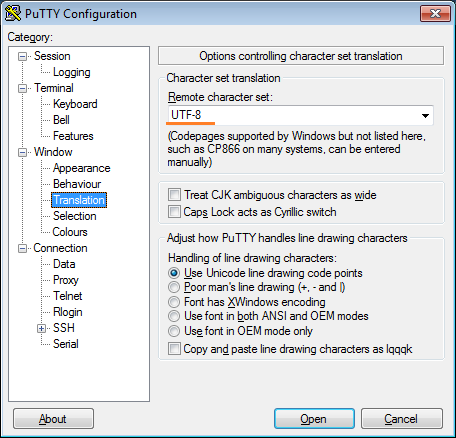
Character encoding
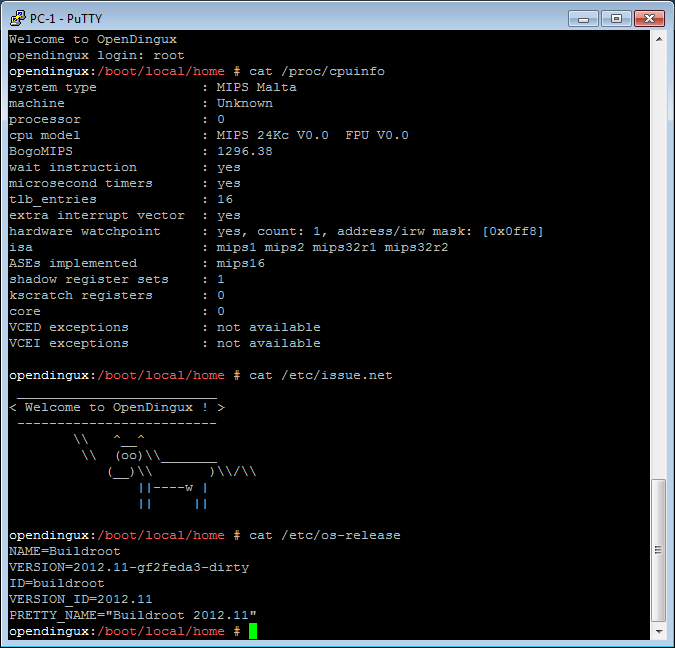
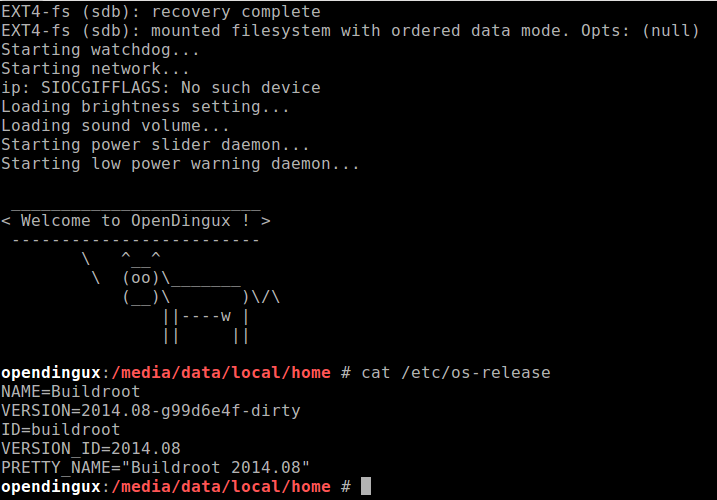
Putty connected to qemu
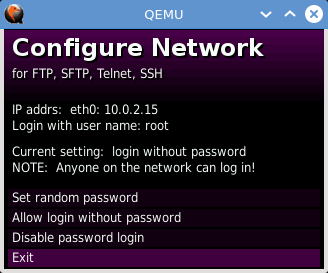
Network
Network interfaces are set automatically for eth0. Wi-fi is not available because qemu doesn’t emulate any.
opendingux:/media/data/local/home # ifconfig
eth0      Link encap:Ethernet  HWaddr 52:54:00:12:34:56
          inet addr:10.0.2.15  Bcast:10.0.2.255  Mask:255.255.255.0
          UP BROADCAST RUNNING MULTICAST  MTU:1500  Metric:1
          RX packets:2 errors:0 dropped:0 overruns:0 frame:0
          TX packets:22 errors:0 dropped:0 overruns:0 carrier:0
          collisions:0 txqueuelen:1000
          RX bytes:1180 (1.1 KiB)  TX bytes:4232 (4.1 KiB)

lo        Link encap:Local Loopback
          inet addr:127.0.0.1  Mask:255.0.0.0
          UP LOOPBACK RUNNING  MTU:65536  Metric:1
          RX packets:0 errors:0 dropped:0 overruns:0 frame:0
          TX packets:0 errors:0 dropped:0 overruns:0 carrier:0
          collisions:0 txqueuelen:0
          RX bytes:0 (0.0 B)  TX bytes:0 (0.0 B)
Sftp or ssh can be used to access remote servers or even you host system from OpenDingux (but not vice-versa).
Note: Accessing host doesn’t work if your host is Windows.
opendingux:/media/home # # username is your name for host system
opendingux:/media/home # sftp username@10.0.2.2