Dingoo a320 OpenDingux emulation in Qemu
by Dmitry Smagin on 2015-04-23
Tagged as: Qemu, OpenDingux, Buildroot, Dingoo a320, GCW Zero.
The title of this article is not quite correct.
What qemu does emulate is mips Malta board which exists in silicon and can host several 32 and 64 bit mips-compatible processors both BIG or LITTLE endian. Hardware-wise it is completely different from jz47xx SoCs with different memory map and additional hardware. This means that only Malta kernel could be used in qemu and not Dingoo a320 or GCW Zero one. Of course, this kernel’s settings could be tweaked according to the situation.
At the same time no one forbids to use any rootfs with Malta kernel and Dingoo a320’s rootfs could be used as well, of course with minor tweaking for qemu’s specifics. This allows to run any software compiled for Dingoo a320 OpenDingux as-is without recompilation. There are restrictions though: software must be generic and must use common linux kernel interfaces and devices. So, programs using MXU simd extension or non-standard devices won’t work and probably crash.
The following text could be interesting for developers who would like to test the behavior of their applications in OpenDingux or debug them in a more comfortable way than with real devices.
From the point of view of the text above, this is not even an OpenDingux emulation but rather a fair OpenDingux port for Malta board being run inside qemu.
Note: When ‘rootfs’ is mentioned here, it’s about Dingoo a320 OpenDingux rootfs (cpu: mips32 r1 soft-float) if the contrary is not explicitly stated.
Building up a modified Malta kernel
First a kernel should be prepared which is a slightly modified Malta kernel. The following implies that you have mipsel toolchain located at /opt otherwise download from here and unpack to /opt.
> git clone -b jz-3.16-qemu  https://github.com/dmitrysmagin/linux.git
> cd linux
> export ARCH=mips
> export CROSS_COMPILE=/opt/opendingux-toolchain/usr/bin/mipsel-linux-
> make gcw0-qemu_defconfig
> make
Despite the name ‘gcw-qemu_defconfig’ it has little to do with GCW Zero hardware. In fact it’s a greatly reduced ‘malta_defconfig’ with some elements needed for OpenDingux:
- Patch which allows i8042 serial controller to properly enable on emulated Malta board. This makes AT standard keyboard work in qemu. For some reason this is missing from mainline kernel, see related discussion.
- Patch that makes cirrusfb driver behave closer to Dingoo a320 driver. Double buffering and vsync are not supported but applications that rely on them will run just fine. If an application requests a resolution that is different from 320x240, cirrusfb just sets requested resolution as-is without rescaling.
- Using initramfs with device tree in tree.txt and mininit.
- Unused hardware is eliminated from defconfig, some other drivers are built statically.
- Kernel command line is hardcoded to
CONFIG_CMDLINE="boot=/dev/sda loop0=/boot/rootfs.squashfs root=/dev/loop0 video=cirrusfb:320x240-16@60
After compilation is complete the kernel image is located at current directory: ./vmlinux This kernel can run both modified Dingoo a320’s rootfs and GCW Zero’s rootfs.
Building up OpenDingux rootfs with buildroot
Second a rootfs image is needed, and buildroot system is used for creating it. In this case a slightly modified OpenDingux rootfs for Dingoo a320 is used. This means that it can also be used with Dingoo a380, Ritmix RZX50 and qemu, and all binaries compiled for Dingoo a320 OpenDingux could be runned as-is.
> git clone -b opendingux-2012.11 https://github.com/dmitrysmagin/opendingux-buildroot.git
> cd opendingux-buildroot
> make a380_defconfig
> make
After some hours of work if no error, the file we need will be located at output/images/rootfs.squashfs
Preparing a disk image
Historically Dingux and OpenDingux ran on external sd-card of Dingoo a320 allowing a dualboot between native OS and Dingux/OpenDingux. For simplification kernel and rootfs images were placed on FAT partition of the sd-card and additional software went to ‘local’ directory, thus typical dir structure looked like: local/bin, local/etc, local/home, local/sbin.
When booting Dingux/OpenDingux sd-card partition was mounted as /boot, then rootfs was mounted on / (and rootfs had an additional symlink /usr/local => /boot/local).
To emulate this behavior a disk image with similar layout must be created.
> dd if=/dev/zero of=512M bs=1M count=512
> mkdosfs 512M
> sudo mount 512M /mnt/
> sudo cp rootfs.squashfs /mnt/
> sudo mkdir /mnt/local /mnt/local/apps /mnt/local/home /mnt/local/etc
> # copy some more software to /mnt/local/apps and unmount
> sudo umount /mnt/
Note that kernel is compiled with the following built-in command line:
CONFIG_CMDLINE="boot=/dev/sda loop0=/boot/rootfs.squashfs root=/dev/loop0 video=cirrusfb:320x240-16@60"Running qemu on Linux host
Qemu should be already installed on your system otherwise do
> sudo apt-get install qemuAt the time of writing, the latest version is 2.2.0 but no harm if an older one is used (at least 1.3.0 worked fine). Now it’s time to burst into action. Typical script to run qemu would look like:
#!/bin/sh

MACHINE="-M malta -m 256"
FIRMWARE="-kernel vmlinux -hda 512M"
HARDWARE="-sdl -soundhw ac97 -k en-us -rtc clock=vm"
NETWORK="-net nic,model=e1000 -net user"
SERIAL="-serial stdio -monitor none"

qemu-system-mipsel $MACHINE $FIRMWARE $HARDWARE $NETWORK $SERIAL
The explanation is obvious: -M malta -m 256 for Malta board with 256 megabytes of RAM. -kernel vmlinux -hda 512M for the generated kernel and disk image, -serial stdio for redirecting serial output to console, other settings for enabling sound, keyboard and network card. If no error, the kernel booting log will immediately appear which ends with login prompt. Type ‘root’ to log in.
opendingux:/boot/local/home #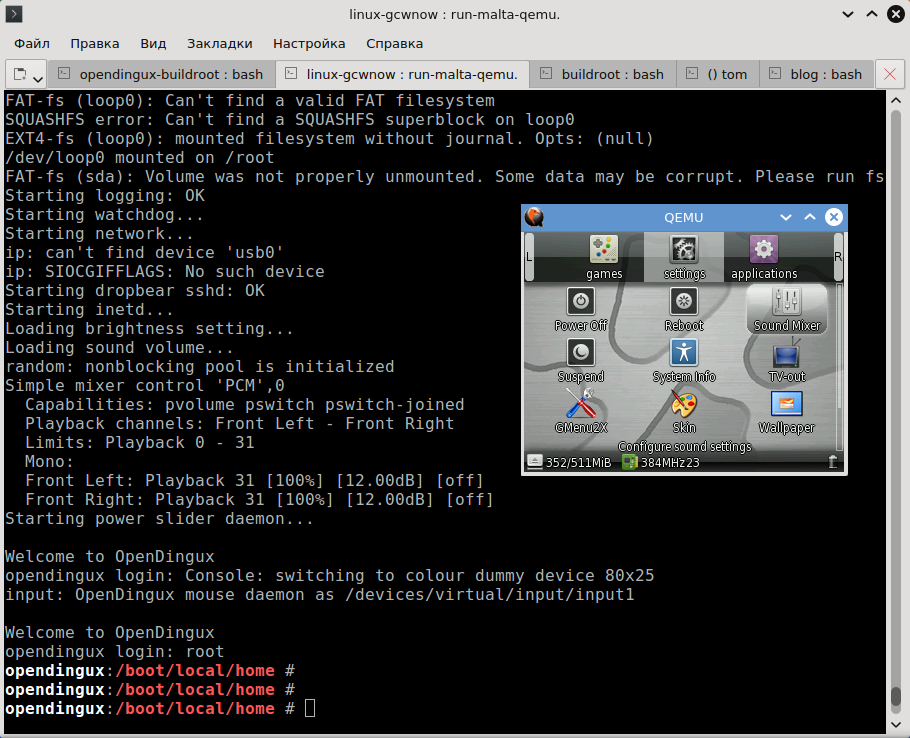
Running Qemu on Linux
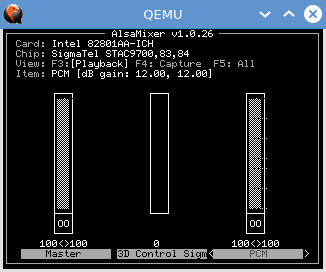
Sound card as AlsaMixer sees it. Note that sound is disabled on each boot, so run AlsaMixer to fix it.
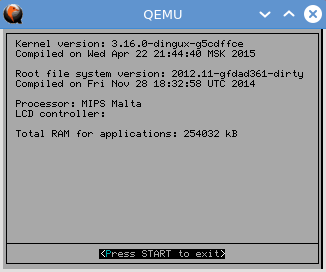
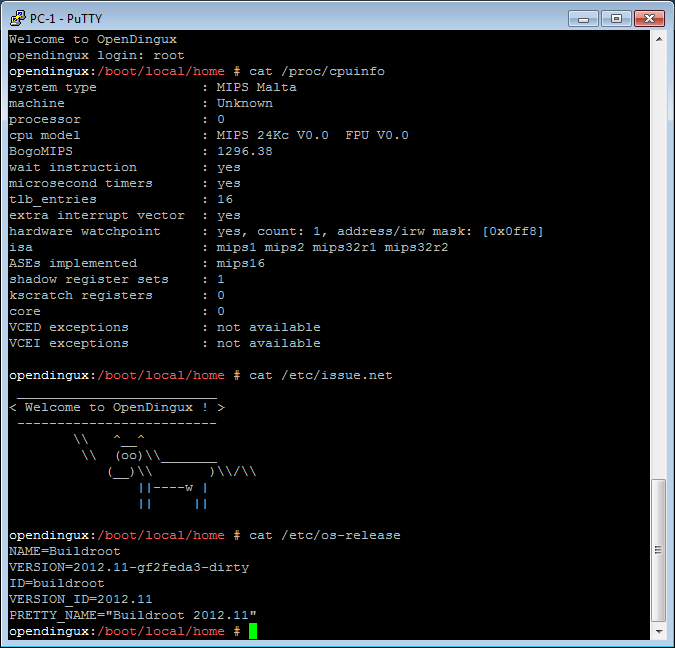
System Info reporting
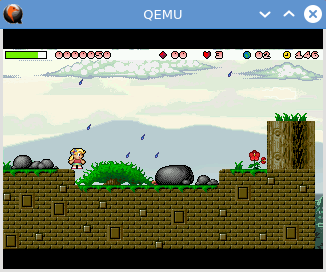
Let’s play some Giana Sisters
Running qemu on Windows host
Using qemu on Windows is somewhat tricky, and some parameters should be set in a weird way. Latest Qemu 2.2.0 binary could be downloaded here
Here’s the example of run.bat:
@CLS
set PORTFWD=hostfwd=tcp::21-:21,hostfwd=tcp::22-:22,hostfwd=tcp::23-:23

set MACHINE=-M malta -m 256
set FIRMWARE=-kernel vmlinux -hda 512M
set HARDWARE=-sdl -soundhw ac97 -k en-us -rtc clock=vm
set NETWORK=-net nic,model=e1000 -net user,%PORTFWD%
set SERIAL=-serial telnet:127.0.0.1:5555,server,nowait

set SETTINGS=%MACHINE% %FIRMWARE% %HARDWARE% %NETWORK% %SERIAL%

qemu-system-mipselw -L BIOS %SETTINGS%
Note that the combination of -sdl -k en-us is very important. If you omit one part you’ll happen to have non-working arrow keys. -sdl option instructs to use SDL for video and input (default is GTK) and -k en-us forces US key layout.
The other annoying thing is Windows console (cmd.exe) which doesn’t work right with escape sequences. Moreover, SDL.dll completely hijacks the stdio output and redirects it to a file stdio.txt, so using -serial stdio is impossible.
That’s why a special redirection is used: -serial telnet:127.0.0.1:5555,server,nowait which means that serial will be fed to localhost on port 5555 using qemu as server and qemu will not wait for connection.
This trick works on Linux hosts as well and using telnet localhost 5555 is possible to access to serial output but it’s fairly overcomplicating since usual stdio is just fine.
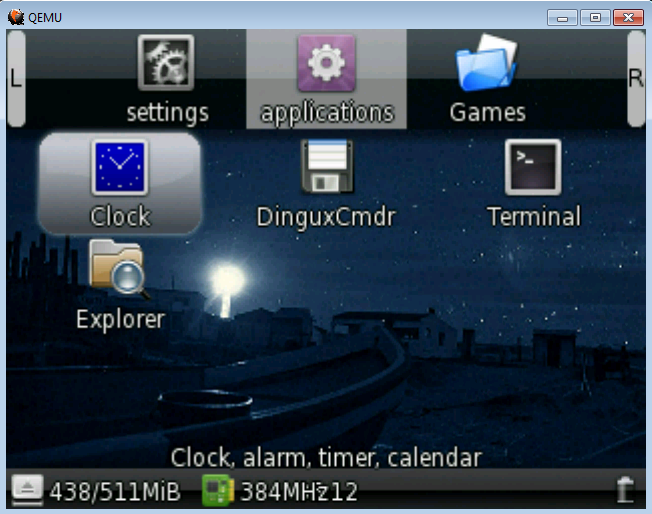
Qemu runs on Windows and scales up gmenu2x
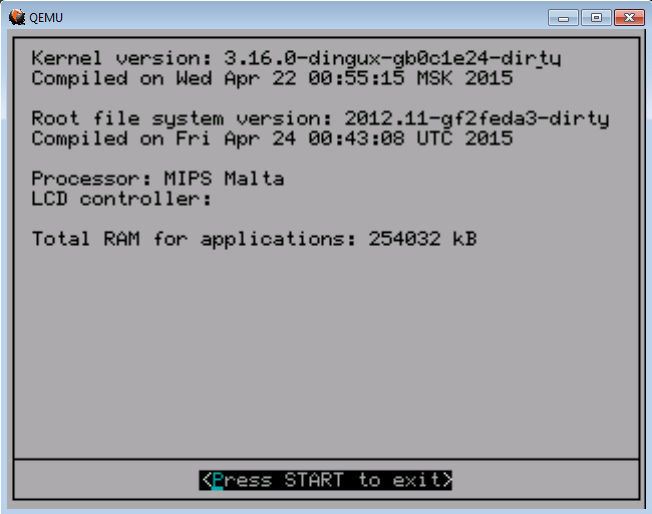
System Info shows MIPS Malta processor
Setting up Putty to catch serial output from qemu
To catch the redirected serial one would use a simple Putty application, download is here
First run qemu, then putty. Set Host Name to localhost, Port to 5555, Connection type to telnet and Saved Sessions to ‘telnet’ or any other name. Press Save and you are done. Optionally, Window -> Translation -> Remote character set could be set to UTF-8. Double click on the ‘telnet’ and press any key on black screen. Normally, there would be some output.
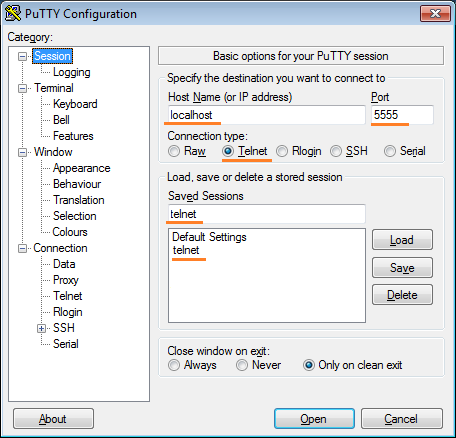
Setting up Putty for qemu
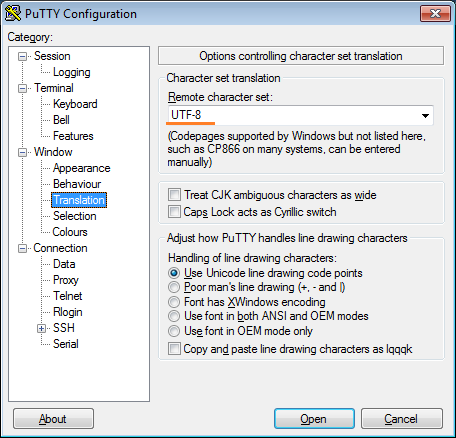
Character encoding
Putty connected to qemu
Network operation on Linux and Windows hosts
On both hosts network is run in user mode by passing ‘-net nic,model=e1000 -nic user’ switches. This is so called ‘user’ mode when guest and host systems are seen as one entity so compicated routing and host-guest interaction is impossible.
However, it’s enought to interact with remote machines.
opendingux:/boot/local/home # ifconfig
eth0      Link encap:Ethernet  HWaddr 52:54:00:12:34:56
          inet addr:10.0.2.15  Bcast:10.0.2.255  Mask:255.255.255.0
          UP BROADCAST RUNNING MULTICAST  MTU:1500  Metric:1
          RX packets:2 errors:0 dropped:0 overruns:0 frame:0
          TX packets:2 errors:0 dropped:0 overruns:0 carrier:0
          collisions:0 txqueuelen:1000
          RX bytes:1180 (1.1 KiB)  TX bytes:656 (656.0 B)

lo        Link encap:Local Loopback
          inet addr:127.0.0.1  Mask:255.0.0.0
          UP LOOPBACK RUNNING  MTU:65536  Metric:1
          RX packets:0 errors:0 dropped:0 overruns:0 frame:0
          TX packets:0 errors:0 dropped:0 overruns:0 carrier:0
          collisions:0 txqueuelen:0
          RX bytes:0 (0.0 B)  TX bytes:0 (0.0 B)

opendingux:/boot/local/home #
DNS should be running at 10.0.2.3, so it’s possible to access remote servers from guest using ordinary urls; such tools like ssh/sftp and wget work flawlessly.
It’s even possible to access from guest to host using ssh/sftp, but this works on Linux hosts only:
opendingux:/boot/local/home # sftp username@10.0.2.2Note, that vice-versa, i.e. connecting from host to guest is not possible without special network settings.
Using host directory as a virtual disk
To facilitate file sharing between host and guest qemu has a special option to mount host dir as virtual FAT partition. This is especially useful for Windows host which doesn’t have tools to manipulate fs images:
-hdb fat:rw:dirnameThis has a restriction though: directory has to fit to FAT16 capacity (~ 516.06 MB). After booting this directory will be visible as /dev/sdb1 device mounted on /media/sdb1 visible from gmenu2x Explorer or DinguxCommander.